
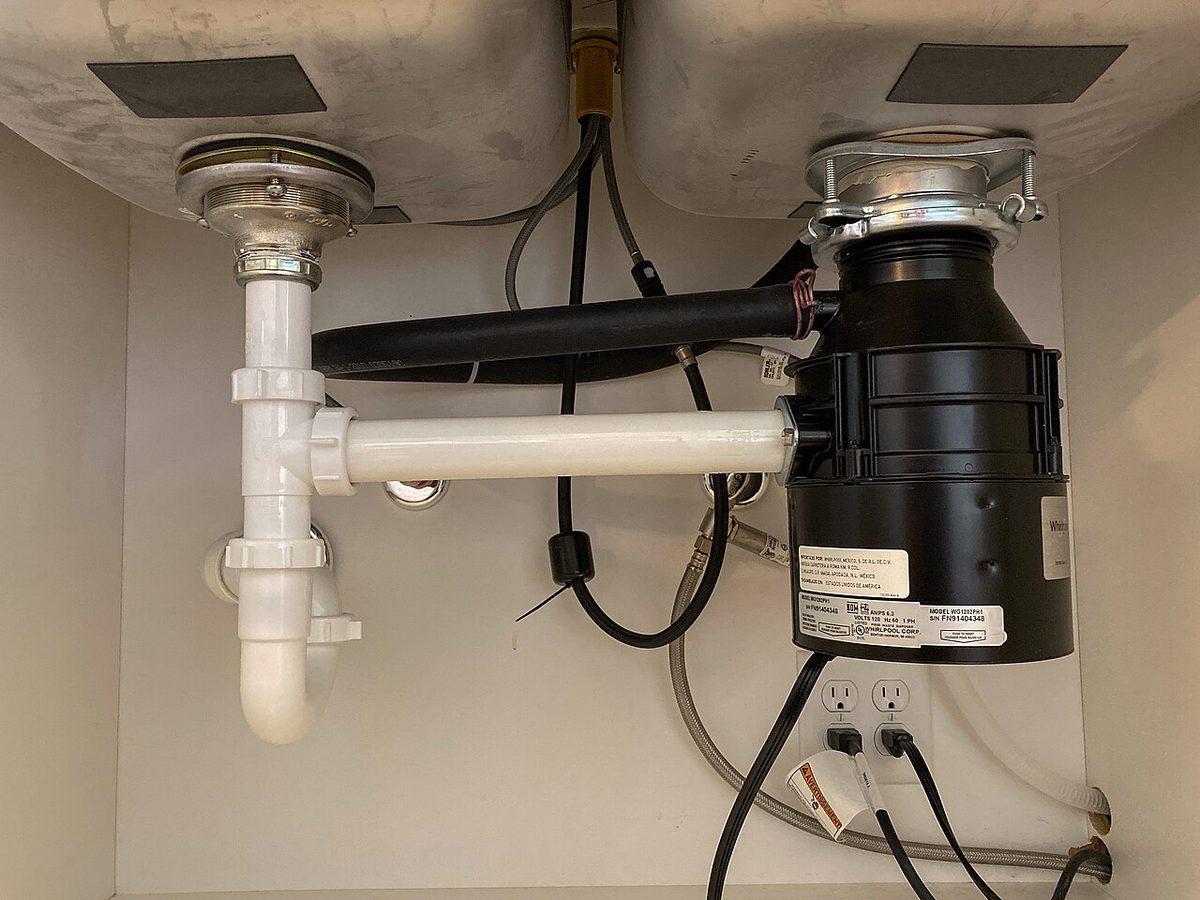
Quick Answer
Fix a leaky garbage disposal in DFW: the newspaper test finds all 6 leak points, and the EPA 48-hour mold clock sets your deadline. Step order from GOAT.
A dripping disposal is a plumbing problem measured in minutes. The water under it is a mold problem measured in hours. Most leaks trace to a loose connection or cheap part, and the newspaper test below finds the leak point in ten minutes. Here is the order, the fixes worth doing yourself, and the one leak that means replacement.
Before You Start: Kill Power, Water, and the Wrong Instincts
Do these four things before you look at anything else. Everything after the test assumes they are done.
- Cut the power at the breaker. The wall switch does not unplug the motor. Pull the disposal's breaker or unplug it under the sink.
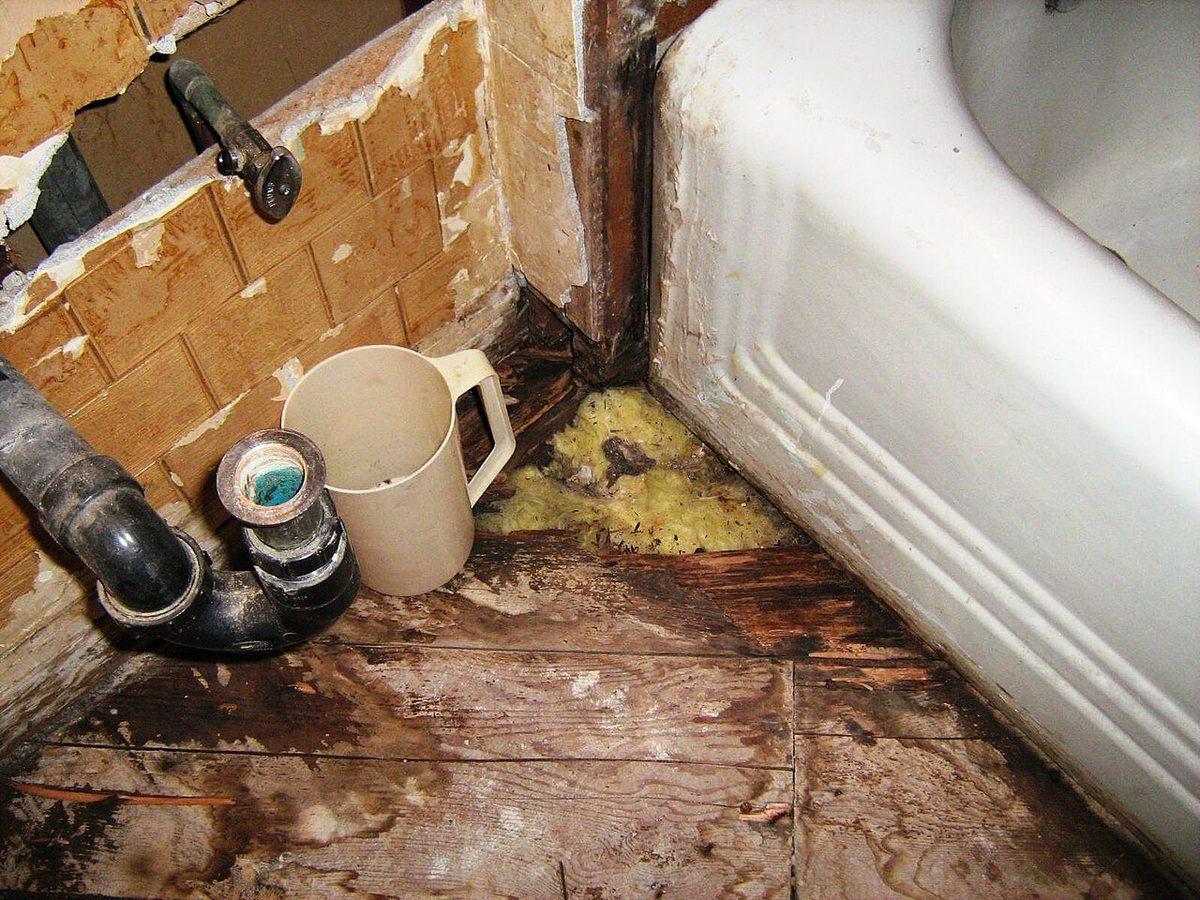
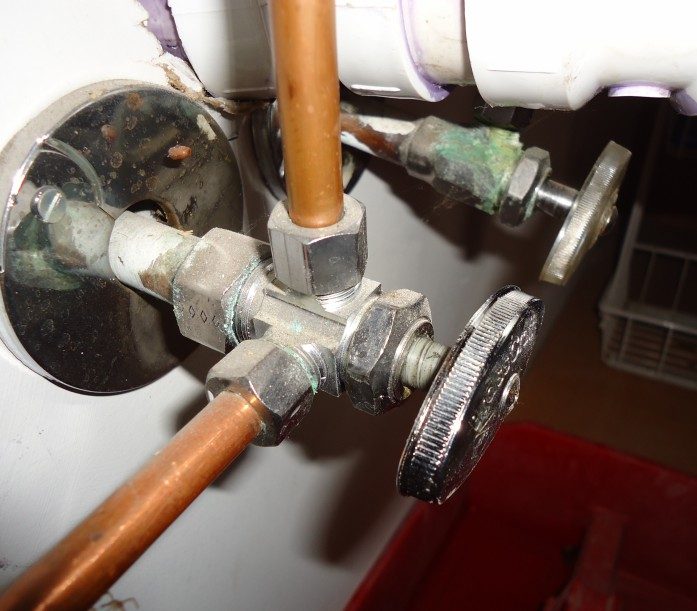
- Shut off water at the two small stops under the faucet, or at the house main if the stops are seized. The Step 2 photo shows what seized stops look like: green oxidation and years of mineral grime.
- Empty the cabinet. A dry cabinet floor is now your diagnostic tool, not just storage.
- Skip the disposal cleaner. Baking soda and vinegar treat odors and clogs. No liquid you pour down the drain seals a gasket or a flange.
Our stance: power first is not boilerplate. A disposal install puts a motor, a switch, and standing water inside one cabinet, and we would rather you lose ten minutes at the breaker panel than lose anything else.
Find the Leak Point: The Newspaper Test, Step by Step
Nine times out of ten, homeowners tell us "the disposal is leaking" when they mean "there is water in the cabinet." That is why manufacturers like InSinkErator tell you to confirm a bottom leak is not a top leak dripping down the housing before condemning anything. Run the test in this order.
- Dry everything. Wipe the flange, the body, both sides of every fitting, and the cabinet floor. The unit must start bone dry or the test lies to you.
- Tape a sheet of newspaper flat under the disposal, covering the cabinet floor. News shows a wet spot in seconds where a folded towel hides the first drop.
- Test the stationary plumbing first. With the disposal still off, fill the sink basins a few inches, hold them five minutes with the stoppers, then drain and watch the trap. A leak in this phase is the sink, the trap, or a supply line, not the disposal.
- Test the supply side. Run both hot and cold while watching the shut-off valves, supply lines, and the sprayer hose behind the disposal.
- Test the disposal with water only. Restore water but not power. Run a steady stream down the drain and look at the flange, the discharge connection, and the dishwasher inlet clamp.
- Test with the disposal running. Restore power, run it with cold water, and watch the newspaper. Vibration shakes loose whatever water pressure alone missed.
Try the colored-water trick: a cup of water with a few drops of food dye down the drain makes the drip path glow. Trace the wet spot on the news straight up to its highest point. Water runs, so the puddle's location is a suggestion and the stain's highest point is evidence.
Our stance: diagnosis is the repair. Nobody should buy a disposal, a flange kit, or a plumber's putty before the newspaper names one of six spots.
Which of the 6 Leak Points Is Leaking?
Match the wet spot to the table below. It maps every leak location to its usual cause and honest repair, ordered the way we check them: easiest and cheapest first.
| Where the water appears | What is leaking | Why it happens | The actual fix | Can you DIY it? |
|---|---|---|---|---|
| Sink flange (top rim) | Flange putty or the mounting assembly | Putty dries and cracks with age; screws loosen from vibration | Re-seat the flange with fresh putty, or re-tighten the assembly | Yes, for a handy homeowner |
| Top rim, putty soft, flange tight | Upper rubber seal or cracked mounting part | Age and grinder vibration | Replace the part, matched to the model number | Yes, if the part is available |
| Side of the unit | Discharge connection to the drain pipe | Loose slip-joint nut or flattened gasket | Hand-tighten plus a quarter turn, or swap the gasket | Yes. 20 minutes |
| Dishwasher hose connection | Inlet clamp or clogged inlet | Clamp creeps loose; the inlet backs water up | Tighten or replace the clamp, clear the inlet | Yes. 15 minutes |
| P-trap or U-bend | Slip nuts, trap gaskets, or a cracked trap | Plastic fittings vibrate loose; gaskets harden | Re-seat or replace gaskets, or replace the trap | Yes. Not a disposal repair |
| Supply valves or lines behind the unit | Angle stops, compression nuts, sprayer hose | Corroded valve seats, aged hoses | Tighten or replace the valve or line | Yes, and often blamed on the disposal |
| Bottom of the unit, top and sides confirmed dry | Internal shaft seal or cracked housing | Seal wear from age and fibrous food | Replace the disposal, or claim warranty first | Replacement is DIY; the seal is not repairable |
Why does a top leak drip all the way to the bottom and lie to me?
The disposal housing is a vertical cylinder. Water escaping the flange runs down the outside of that cylinder and drips off the lowest point: the bottom plate, often right by the red reset button. It looks exactly like an internal seal failure, and it is not. InSinkErator's own troubleshooting guidance says to confirm a bottom leak is not water coming from somewhere else before treating it as a failed unit. This single fact is why a confirmed bottom leak is the only entry in the table that means replacement: everyone has already run the water down past it, and a fresh wet spot there is new water.
Is a little drip under the dish soap bottle an emergency?
The disposal is not the emergency. The cabinet is. Kitchen cabinet bases are particleboard wrapped in thin laminate, and particleboard drinks water and does not give it back. The EPA's brief guide to mold says to clean and dry wet materials within 48 hours to stop mold from taking hold, and the EPA mold cleanup page treats porous materials that stayed wet as discard-first items. A slow drip that has been "almost invisible" for weeks has already been running its own clock on your cabinet bottom.
Our stance: if your wet news points at the top, the side, the hose, or the trap, you own a repair that costs the price of a takeout dinner in parts. If it points at a confirmed bottom leak, you own a replacement decision, and the only DIY move left is the warranty check in the next section.
What Is the Right Repair Order, From Loose Nut to New Unit?
Work the fixes cheapest-first. The order below resolves most disposal leaks without buying the unit a replacement.
Top leak: re-seating the sink flange with plumber's putty
You need: plumber's putty, a putty knife or an old credit card, a screwdriver, channel-lock pliers, and a helper or a prop stick to hold the flange.
The sequence: with power and water off, disconnect the discharge pipe and dishwasher hose, then unmount the disposal from its mounting ring and set it in the cabinet (it is heavy; support it). From above, remove the flange screws and clips, lift the old flange out, and scrape every gram of hardened putty off the sink rim and the flange. Roll a rope of fresh putty about the thickness of a pencil and press it around the flange foot. Seat the flange, snap the clips back from below, and tighten the screws a little at a time in rotation so the flange pulls down evenly. Push the disposal back onto the mount, reconnect the drain and hose, and run the newspaper test again before calling it done. Expect an hour to two hours the first time.
Side leak: discharge nut, gasket, and dishwasher inlet
You need: nothing for a loose nut, and a model-matched discharge gasket (sold at any hardware store for a few dollars) if the old one is flattened or stiff. Loosen the slip-joint nut, pull the discharge elbow out, inspect the black rubber gasket, swap it if it has taken a permanent set, and re-tighten by hand plus a quarter turn with pliers. Plastic drain parts crack when over-tightened, so the quarter turn is the whole skill. While you are there, squeeze the dishwasher hose clamp and drop the hose into a bucket to check the inlet for sludge.
Not the disposal: P-trap and supply-line repairs
If the news says the trap or a valve, fix the plumbing, not the appliance. Place a bucket under the U-bend, unsnap the slip nuts by hand, dump the water and gunk, check every gasket ring for hardening or twisting, and reassemble finger-tight plus a nudge. For supply lines, the fix is a new braided hose or a new angle stop, both standard parts. If a shut-off valve is too corroded to turn by hand, like the green one in the Step 2 photo, stop forcing it and replace the valve. Seized valves snap when they are forced, and then your ten-minute repair becomes a whole-house shutoff day.
Before You Replace: Check the Warranty First
A confirmed bottom leak means the unit, but it does not automatically mean you buy the unit. InSinkErator backs its disposals with in-home warranties that run several years depending on model, and their warranty page explains how to read the serial number on the gray tag near the bottom of the disposal to date the unit. In-home means a service representative comes to you. Many disposals installed in production homes are mid-tier models with multi-year coverage, and a serial number photo takes ten seconds. Check it after lunch, before checkout.
Our stance: fix order is not a suggestion. A new disposal bought over an unconfirmed leak leaves the real leak in place, and the drip path reopens within weeks.
How Do You Verify the Fix and Save the Cabinet?
The repair is not done when the part is swapped. It is done when the test passes and the cabinet is dry.
The verification routine: three full cycles
Cycle one, stationary: dry every surface, lay fresh news, fill both basins, hold five minutes, drain. No wet spots. Cycle two, running: power on, cold water running, disposal humming, food-dyed water down the drain. No wet spots. Cycle three, morning check: the leak that shows up overnight after a day of vibration is the one that comes back. If all three cycles stay dry, the repair held.
Now save the cabinet. Pull the toe kick if the base is swollen, aim a fan into the cavity, and run it continuously. The EPA's moisture guidance puts the drying window at 48 hours, and DFW humidity through May through September shortens it, which is why we treat "wipe it up" as the beginning of the job, not the end. If the base is soft or you can smell mustiness a week later, the surface-drying route has failed, and our mold growth timeline for DFW homes covers what happens in the cavity next. Check the ceiling directly under the kitchen while you are at it. Disposal-cabinet water travels, and what a ceiling stain means is its own story.
Will Insurance Cover This?
Texas homeowners policies generally cover water damage that is sudden and accidental, and standard flood-insurance guidance spells out the distinction: a sudden discharge is covered, a gradual leak that seeped for weeks is not. A disposal drip is the textbook gradual leak, so plan on the repair and the dry-out being yours. What you control is the size of the loss. Catch it this weekend and the cost is putty and an afternoon. Let it soak a cabinet and a wall for a month and you are buying demolition, drying equipment, and a mold question.
Our stance: verify with cycles, not confidence. A repair that passes one careful test and fails the next morning costs you a second demo, and the cabinet only gets one chance at the 48-hour clock.
When Do You Call a Plumber, and When Do You Call Us?
Some of these jobs belong to a plumber, and some belong to us. Draw the line like this:
- Call a plumber for a confirmed bottom leak on an out-of-warranty unit, any gas-adjacent or supply-line work beyond swapping a valve, an old disposal with a seized mounting assembly, or a flange repair that fails twice.
- Call GOAT Home Services when the water has left the cabinet. If the drip reached drywall, the base is soft, the ceiling below has a stain, the leak ran long enough to smell, or a supply line failed while you were out and multiple rooms are wet, that is a restoration job, and our water extraction service starts with moisture readings, not a spray bottle.
- Call us the same day for Category 2 or 3 water. If the water came up through the drain (a backed-up disposal on a shared line is sewage territory), our sewage cleanup sequence explains why that one is never a DIY rinse.
For the DIY route, our flooded bathroom how-to covers the same dry-out discipline for the room next door, and the pattern for stopping water fast is in our flooding toilet guide. If the leak source turned out to be an appliance failing outright, our water heater leak guide is the kitchen's louder cousin.
If the water is already in the walls or under the floor of your Dallas-area or Collin County home, our 24/7 emergency response dispatches at (469) 525-2254. We would genuinely rather take your phone call and talk you through a $5 gasket than watch you find us in six weeks with a black wall cavity.
Our stance: the disposal is an appliance you can carry home from any hardware store. The cabinet, subfloor, and drywall behind it are a demolition-and-drying job. Fix the disposal this weekend, dry the cabinet tonight, and keep the whole thing in the cheap column.